Fussy-cut roofline


Have you ever wondered how I get those fussy-cut rooflines on my “Home for the Holidays” house blocks? If so, this post is for you! Sneaking tiny details into those thin rooflines isn’t always an easy task, but I’ve got a method that may just help.
Photo 1: Here, I’ve started piecing a section of the bottom of the house and have stopped at the roofline piece.
Photo 2: I grab whichever fabric I’ve chosen for my roofline and a small ruler. A large ruler would also work, but when I’m fussy cutting small details, small rulers are less cumbersome. I’ve taken the liberty of marking up this photo to help illustrate my method. First, I take into account the direction of the print and the orientation needed for the section I’m piecing. Second, I decide which row of bats in this print will be featured in the roofline. (I’ve circled a bat in yellow to show you which row will be featured.) Next, I need to create the seam allowance, so I trim the fabric a little more than 1/4” away from where I want the fabric to show. (Trimmed fabric not shown, but ruler is placed exactly where I trimmed.) By giving myself just a little more than 1/4” from the row of bats I want to feature, I provide myself a little wiggle room. Just enough so that my seam line isn’t right next to or directly on top of the bats. (I’ve highlighted the 1/4” marking with a solid yellow line in this photo to help illustrate where the seam line will be.)
Photo 3: Stitch the roofline piece onto the section and press open.
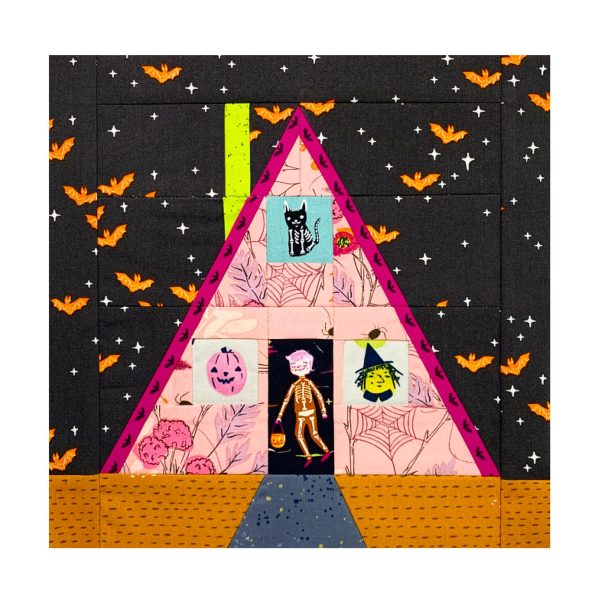
Photo 4: The final house block with batty rooflines!
Stay up to date!
Subscribe to receive occasional emails about new pattern releases, shop sales and exciting news updates.