The Perfect Fussy-Cut Book Spines
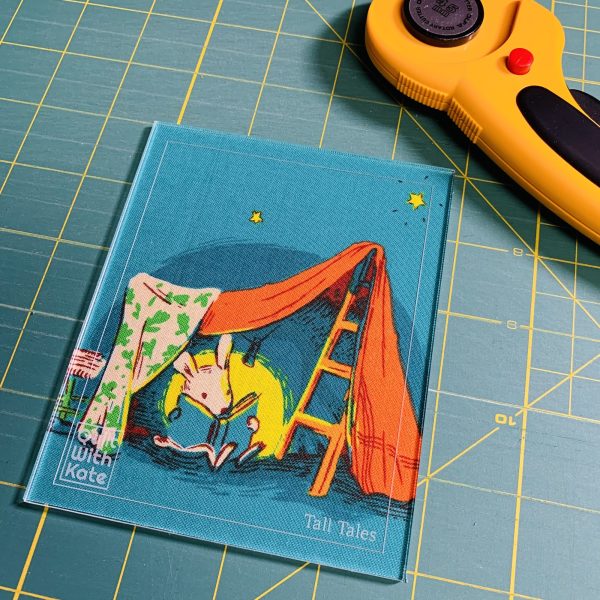
I’ve been having so much fun working on my newest Tall Tales quilt, and it’s the first version that I’ve made using fabric selvages for cute, fussy-cut spines. I did a deep dive into my stash to find and remove lots of fun selvages, and I’ve got a pile on my sewing table just waiting for a perfect fabric book cover match.
I’ve gotten questions over the last few months about my fussy-cut book spines, so I thought I’d share a few tips on how to get that perfect fussy cut. I should note that not all selvages will work for my Tall Tales pattern. When searching for selvages in your own stash, keep an eye out for wider selvages. Ruby Star Society fabric, in particular, provides the perfect selvage size for Tall Tales book spines.
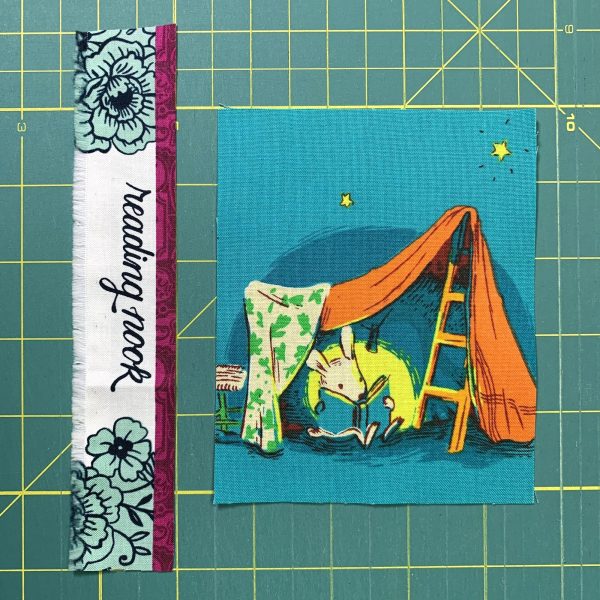
Step 1: First and foremost, I recommend a book cover fabric that feels like a good match to the words on your selected selvage. For example, I chose a print from Heather Ross’ collection Lucky Rabbit that features a sweet, little bunny reading a book under a homemade tent. The fabric selvage I’ve decided to pair with it reads “Reading Nook.” A great match! To get just the right fussy cut for the book cover, I use my Tall Tales acrylic template (available in my Etsy shop!), align the the template over the fabric portion I want to use, and trim around the template. Voila! A fussy-cut book cover!
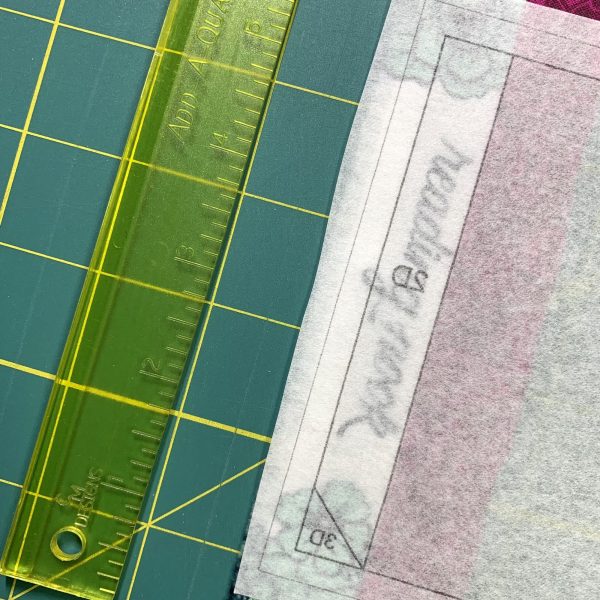
Step 2: Trim out section D of the pattern with a healthy margin around all trim lines. Select your selvage, iron it flat, and place it right side up on your table. Next, place the pattern section upside down, printed lines face down, so that section 2D (the spine) is over top of your selected selvage. Align the portion of the selvage that you wish to fussy cut within the 2D portion of the pattern. (Personally, I love June Tailor’s Perfect Piecing Paper, because it’s translucent enough to see what I’m fussy cutting. You can find bulk packs of the FPP paper online at Amazon or in stores like Joann.)
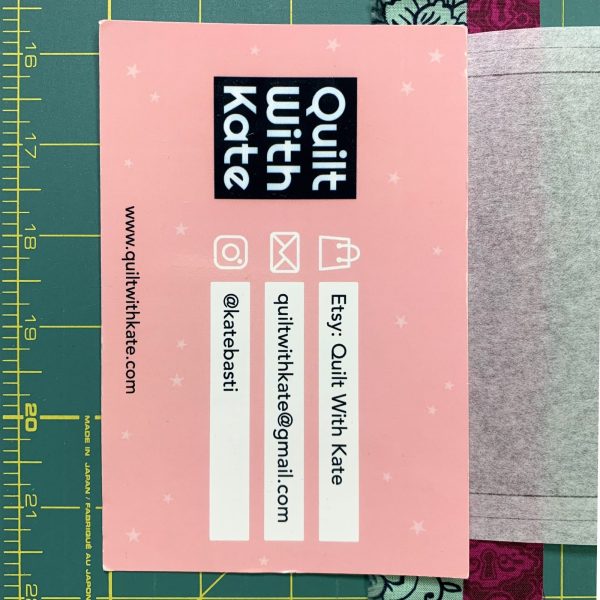
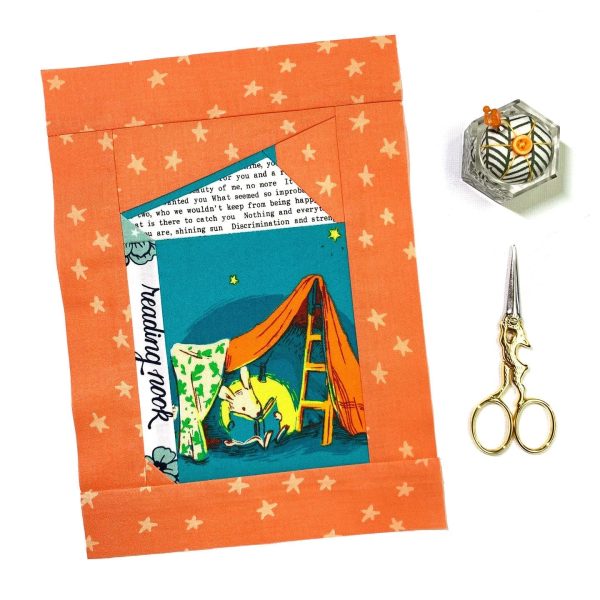
Step 3: Grab your piece of card stock (in my case, one of my Quilt With Kate postcards) and place the edge of the card on the line between 1D and 2D.
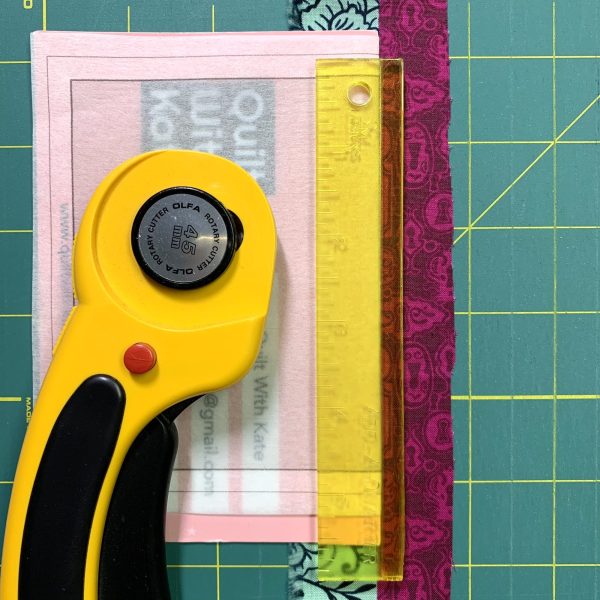
Step 4: Fold the paper over the notecard, as you do when foundation paper piecing, place your Add-a-Quarter ruler against the edge of the notecard, and trim the excess selvage. This creates the seam allowance for when you sew pieces 1D and 2D together.
Step 5: You now have a fussy cut book cover and spine ready to stitch together!
This method of pre-cutting fabric works for any tricky area of an FPP pattern that you’d like to ensure a perfect fussy-cut.
Happy sewing!
Stay up to date!
Subscribe to receive occasional emails about new pattern releases, shop sales and exciting news updates.